

Building a fishing rod is a rewarding experience in addition to being a great survival skill. It doesn’t necessarily have to be expensive either, depending on the building method you select.
Based on our past research and experience, we’ll break down a few of the most common DIY fishing rod-building techniques in this article.
Table of Contents
Wooden Fishing Rod
We will first construct a wooden fishing rod. Here’s what you need:
- A nice stick 8-10 feet in length
- Coarse string
- Fishing Line
- Fishing Hook
Prepare the Wood
Find a sturdy, straight stick that is between 8 and 10 feet long as a starting point. Despite the fact that your rod won’t actually be that long, we always start out larger in case we mess up or need to cut some off. The only direction we can move in is smaller.
Remove any leaves or branches from the stick, then use some rough sandpaper to smooth out any protruding branches or leaves that may have been left on the stick. Pay close attention to any weakened areas or flaws in the forest as well.
Find a different piece of wood or, if possible, cut that section off if you notice any particularly dry or rotted areas of the wood.
Attach the String and Line
Next, take a piece of string that is about 20 feet long and tie it to the branch’s narrowest part. The distance from the stick’s end should be between two and four inches.
The remaining length should be wrapped around the stick after a tight knot has been made. You can now take some fishing line and secure it to the string’s end. Your line will be what you use to cast with, and the string will support it.
Depending on where you’re fishing and how far you want to push this, you may decide to use more or fewer lines. You won’t need much line if all you want to do is jig something in the water. It will be necessary to tie a lot of lines if you want to cast far, which will make the rod more difficult to control.
Then, using a knot of your choice, attach a hook to the line’s end. Unwind the entire assembly before dropping it into the water to the desired depth when you’re ready to fish.
PVC Fishing Rod
We will now take things a step further and construct a more sophisticated homemade fishing rod. Here’s what you’ll need:
- Two PVC pipes
- Two ½-¾ inch slip caps
- Drill and 3/32 bit
- Medium-sized binder clips
- Fishing reel of your choosing
Cut the Pipe
Cut the two pieces of PVC pipe to the length you want as the first step. It’s up to you how long you want the rod to be since the combined length of these two pieces will be that length. I’d suggest a total length of six to seven feet.
You could make the rod a little shorter if you’re making it for a child. After you’ve cut it down, use some sandpaper to clean up any blemishes and smooth out the edges.
Attach Slip Caps
Now align the threaded connector, the two slip caps, and the pipe. Don’t glue or secure them yet because we need to double-check everything first.
Drill Holes
The smaller pipe should have four holes drilled through it using a 3/32 drill bit. Your rod’s length will determine how many holes you need to drill, but make sure they are evenly spaced apart, and don’t drill too many. In 99.9% of cases, four holes ought to be sufficient.
Attach Eyelets
The binder clips you are holding now will be our eyes. As many eyes as holes are what you’ll want to have. With the help of your pliers, bend one end of the wire clip across the other, forming a closed loop on one end and two legs pointing inward at the other.
The legs should now be secured in the PVC pipe’s holes using clips. Your eyelets will be located in the final open loop. If they are not tightly fitting, try further bending the wire while making sure that both ends are pointing in the same direction. Continue until every hole has a pair of eyes.
Attach Reel
After that, take the fishing reel and fasten it to the longer PVC tube. Drill two holes in the reel with the same drill bit, then secure it with screws. I would advise choosing a fairly lightweight lure because a heavy lure will weigh down the entire rod and you don’t want something too heavy if you have to travel long distances with it.
Combine the Two Halves
The slip caps can then be used to join the two halves. Since you’ll need to be able to separate the two sections so you can store the rod in a fishing backpack, you’ll want to glue the two slip caps together but not both pieces. It will be much simpler to transport thanks to this.
When you’ve finished, you can put a lure and bobber on there and run your line through the eyes to attach a hook.
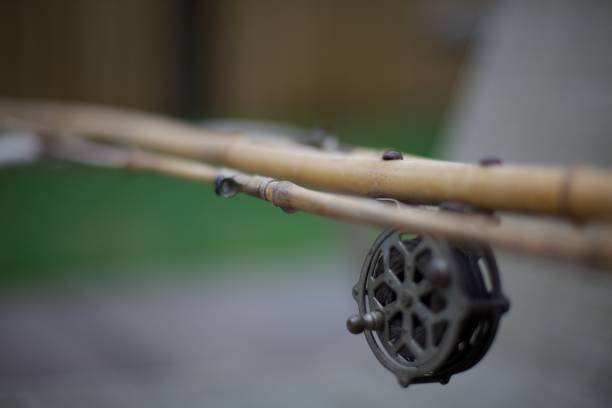
Bamboo Cane Fishing Rod
Unbelievably, bamboo’s strength and flexibility make it an excellent material for fishing rods. Even though the rod isn’t made of fiberglass or graphite, big fish seem to tolerate it fairly well. You can make your own bamboo fishing rod by following the steps listed below.
Trim and Smooth It
Similar to the wooden stick, you should look for a piece that is 8 to 10 feet long. You have some leeway if you make a mistake because you can always cut some of it off if it’s too long.
You don’t want anything too girthy when it comes to width; one or two inches should be sufficient. It will be difficult to carry and uncomfortable to use if it is too big. In case you make a mistake that cannot be undone, I advise having more than one piece of bamboo on hand.
A sharp knife can be used to begin trimming the pieces once you have a few of them. Sand the entire area with coarse-grit sandpaper to remove any leaves or flaws. With a ruler and a saw, cut it to the length that you find most comfortable. They should also be sanded.
Let It Dry
Due to the high moisture content of bamboo canes, you may or may not need to perform this step, depending on how you obtained them. By letting them air dry, you can be sure the cane will be sturdy and strong enough to hold your fish.
It is advised that you tie it in a horizontal position and let the cane hang there for a few weeks. Once it has dried completely, it will be brown. To test its strength, you can swing it a few times through the air. If it bends, give it more time to dry or try a different piece.
It is not advisable to try to hasten the drying process of bamboo in the sun because doing so will make it brittle and prone to cracking.
Attach Your Line
You can now use your fishing line to fasten the bamboo. Expert rod builders recommend a very specific method for carrying out this task. The line should be tied about two inches above the handle of your pole, then run the entire length of the bamboo until you reach the end, according to their advice.
This is done so that the pole will bend when you’re fighting a fish rather than exerting all of your weight on the line, which will make it more likely to snap.
So, in essence, what you’re doing in this situation is wrapping the line around the rod in the direction of the handle. Then, at a few locations leading to the rod’s tip, you will make the same loop. As you approach the end of the other loops, continue the extra line from the handle loop. The additional loops are there to keep the line in place and serve as your casting line after that.
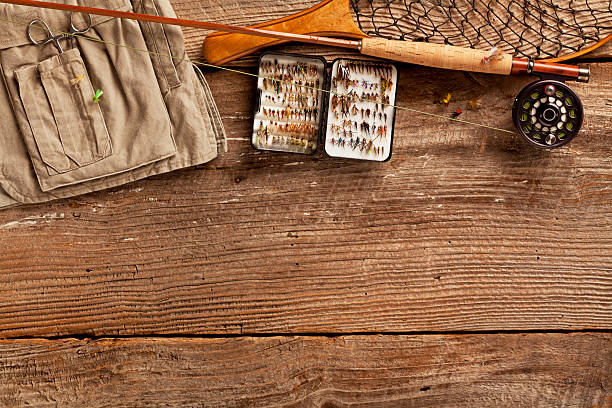
Your Own Professional Rod
While playing around with sticks and bamboo is nice, what if you want to make a “real” fishing rod that can function as well as some of the ones you buy? It will take a lot more planning, some additional knowledge, and money, but it’s worthwhile. You’ll need the following items to get started.
- Wrappers
- Finish dryers
- Reamers
- Scissors
- Masking tape
- Measuring tape
- Calculator
- Alcohol tour
- Finish and epoxy resin
- Rod blank
- Handle and cork
- Hook
- Thread
Steps to Building Your Rod
- Locate the spine– The steel insert must be placed inside the rod blank to accomplish this. To build upon that, you must be aware of its location.
- Prepare the handle– By constructing the rod’s butt out of the handle and cork, you can achieve this.
- Grip assembly – Using the epoxy resin, you can affix the grip assembly to the rod’s butt once it has been put together.
- Reel seat– Because it keeps the spool in place, the reel seat is a crucial component of the rod. Simply buy it outright and fasten it to the grip assembly.
- Foregrip assembly – Once more, you can’t make this on your own; in fact, you probably bought it. Use the epoxy resin to fasten it to the reel seat.
- Insert rod blank – Now you can take your rod blank and attach it to the entire assembly.
- Rod guides – Depending on your preferred method, prepare the guides and attach them using the resin and wrap.
- Apply finish – If you’re making a surf rod, you’ll now finish the rod to prevent corrosion from saltwater.

Fishing Rod Building Kits
We advise choosing a fishing rod-building kit instead of pulling out your toolbox and attempting to buy everything separately because it will make the process so much simpler and you’ll still feel proud of having built your own rod.
There is something for everyone since they sell spinning rod kits, casting rod kits, fly rod kits, handles, and ice fishing pole kits. If you’re not the world’s most skilled person, you’ll be grateful to give yourself a starting point.
Final Thoughts: Entertaining and Useful
Building a rod with your own two hands and using it to catch fish is satisfying. It’s crucial to learn how to construct a fishing rod for both personal enjoyment and survival in an emergency. Whether you’re putting together a “bug-out” kit or killing time on a weekend, DIY rods are entertaining and useful if constructed properly.