

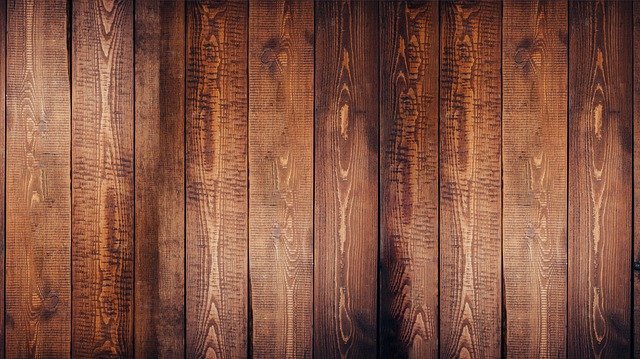
How is wood prepared for use outside? In essence, using a wood sealer, varnish, or oil finish are the best ways to prepare wood for outdoor use. It entirely depends on the project and the type of wood that needs to be treated as to what kind of treatment should be used.
Table of Contents
How To Treat Wood For Outdoor Use
There are several ways to accomplish this, as I’ve already mentioned. The five most typical ones will be covered. Before you make a choice, you should understand all of these options, regardless of whether you think any of them will be useful to you.
Wood Sealers
Perhaps one of the most reliable ways to keep your wood from rotting and weathering is to use wood sealers. While they don’t use pressure, they function similarly to a pressure treatment. Most wood sealers are made of a plastic or acrylic compound. After that, the wood is given a pour of this substance and is left to soak. When the plastic has dried, it will have covered the top few inches of the wood on both the inside and outside of the surface.
Wood sealers are very simple to use and only need to be reapplied every one to five years.
Be aware that softer wood is more porous if you choose this option. It will therefore need more sealer in order to provide it with sufficient protection. The sealer will be able to penetrate the wood much deeper thanks to the softer wood.
Utilizing a wood sealer is incredibly easy:
- Step 1: Give the wood’s surface a light sanding and clean it.
- Step 2: Use lots of sealer on the surface. Either a brush or a cloth can be used to apply it. You could also use a spray gun. It is crucial that you avoid leaving any observable sealer streaks.
- Step 3: Make sure the sealant has finished drying. To get a good idea of how long that will take, check the product label. 24 hours is typical, but some will be much quicker.
- Step 4: Before adding another coat of sealant, lightly sand the surface once more. Use the best grade of sandpaper that you can find.
- Step 5: If desired, apply a third or fourth layer after allowing the second layer to dry.
Oil Finishes
If plastic-based sealants hadn’t been invented, you might be wondering how people used to waterproof their wood. The answer is that they would apply a variety of oil finishes to outdoor wood. Giving your wood one of these hand-rubbed oil finishes isn’t that difficult, and it has the added benefit of making the wood look really nice.
The two materials below make up the majority of wood oil finishes: either linseed oil or tung oil. Linseed is derived from the flax plant, while tung oil is derived from the tung tree. Although they aren’t necessarily the same, both of these plants have qualities in common.
Dark woods like walnut are a good candidate for this type of finish because the high level of shine really enhances their appearance.
Although they won’t penetrate the wood as deeply as some other substances, these oils do soak into the grain. Nevertheless, they will offer a waterproof surface, and that is the objective. While tung oil has a much longer history of use (especially in China), linseed oil has traditionally been used for musical instruments and other pricey wooden crafts. Some products will combine these two ingredients, and these are frequently marketed as “Danish Oil.””
The steps below should be followed to apply a hand-rubbed oil wood finish.
- Step 1: The wood’s surface should be thoroughly cleaned and lightly sanded.
- Step 2: Apply the oil finish to the surface using a paintbrush with soft bristles.
- Step 3: Permit the oil to completely absorb into the surface. For a clearer understanding of your timeframe, consult the product label. Add a little bit more if you notice any dry patches as the product dries.
- Step 4: Remove any extra oil that didn’t seep into the wood by wiping it off with some dry, clean rags.
- Step 5: Do a light sanding of the surface.
- Step 6: Apply as many additional layers as desired. Remember to lightly sand the surface in between each layer.
Pressure Treatment
Clearly, DIY projects cannot use this industrial process because it is too expensive. The wood is impregnated with preservatives using a combination of hot water, pressure, and a number of different preserving agents. In order to eliminate any chance of internal rotting, the pressure forces it deeply into the wood’s grain.
Copper azole, alkaline copper quaternary, or another copper compound are frequently used as preservatives. It shouldn’t come as a surprise that this ingredient would be used because copper has a high resistance to weathering. Don’t worry if you purchase pressure-treated lumber that appears wet: The preservatives will be left behind as the water evaporates.
When To Use Which Method To Treat Outdoor Wood
Stain-sealer Combinations
You can easily apply a stain and a sealer at the same time if you’re having trouble deciding between the two. There are several products available that combine sealer and stain in one solution. It would be quicker to complete everything at once if you were going to do both of these things anyway.
In terms of composition, these products are very straightforward. The polyurethane-based sealer can be made to color and seal at the same time by mixing in a dye. Such a finish can be very advantageous for light-colored wood. The wood will frequently appear older than it actually is as a result of the fading and yellowing of polyurethane-based coatings. If light-colored wood is used, this effect is particularly apparent.
You can make sure that your wood is dark enough to conceal any potential fading of the plastic finish by using a stain and sealer combination. In addition, these products can give you a very accurate way to shade your wood. The level of pigment that is added to the polyurethane will determine how dark of a finish you get.
Simply take the same actions as you would for a wood sealer product when applying a stain/sealer combination. While the application of combo products is essentially the same, drying times between coats will likely be longer. Be sure to read the label carefully and adhere to its instructions because they might also need additional steps taken when preparing the surface.
Varnishes
Varnishes are very similar to sealants in that they are typically made of polyurethane. What distinguishes them from the numerous other oil varnishes that are available, though? The process by which a varnish is applied is what sets it apart from an oil finish.
Contrary to the majority of our other options, varnishes are not intended to soak into the wood. Instead, a varnish forms a waterproof coating that is added to in layers to form a hard exterior layer. This will act as a kind of protective shell that deters moisture and absorbs shock without damaging the wood itself.
Simply adhere to these simple instructions to varnish anything made of wood:
- Step 1: Look for a tidy area to work in. The varnish must not be contaminated by dust, lint, or other small debris. Additionally, the area where you work should have good ventilation.
- Step 2: For a little more roughness, use some fine sandpaper on the surface. This will promote the varnish’s adhesion. For maximum smoothness, be sure to sand against the wood’s grain.
- Step 3: Remove all wood dust from the recently sanded surface using a tack cloth or something comparable.
- Step 4: Mineral spirits are roughly equal parts to the varnish when combined. This will make the healing process more difficult.
- Step 5: Utilizing a soft-bristled brush, lay out your pieces flat and apply varnish. The first layer should be applied by brushing against the grain, and the second layer should be done with the grain.
- Step 6: Permit the varnish to finish drying. For precise drying information (typically 24 hours), refer to the product label.
- Step 7: Till the coating is the desired thickness, apply more coats.
Oil Finishes
The easiest and quickest way to finish a project outside is with exterior oil. However, it will only shield you from the difficulties of the outdoors for about a year. Unlike varnish, which forms a layer on top of the wood, oil finishes don’t.
Instead, the oil penetrates the fibers of the wood and dries. Trans-oxide pigments are commonly found in exterior oils for UV protection and mold and mildew resistance. From dark brown to light amber, there are several colors available.
How To Apply Oil Finishes
- The only equipment needed for application is a garden sprayer and a cloth.
- Start by applying oil evenly across the project’s surface. Then, you can employ a cheap garden sprayer with a hand pump. It is simple and quick.
- Before wiping it away, let the oil absorb as the manufacturer has instructed.
- You might need to renew once a year, depending on the circumstances in your area. If you regularly reapply the oil, the integrated UV protection should keep your wood looking natural for many years.
Sealant And Varnish
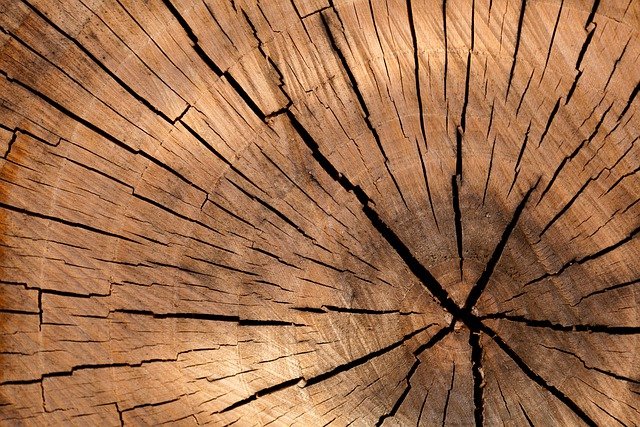
Despite having a lovely appearance, natural wood needs to be coated to keep it that way. This defense arises from the fact that wood is porous and quickly absorbs water, resulting in irreparable harm if left unattended.
Your wood is also harmed by humidity and rain, which makes it twist, swell, and eventually rot. In light of this, using the best water sealant on your fence, deck, or other outdoor furniture will help it last longer by preventing you from having to repair or replace it following a wet winter or humid summer.
Ancient wood can be restored to look brand new. Use a sealer and an outdoor stain together to treat your wood. To increase the lifespan of your wood if you do not use a mix, preserve it first.
Pressure Treatment
The majority of the time, pressure treatment is used when it is certain that the wood will be in close proximity to something that could provide moisture.
Since wood is porous and absorbs water like a sponge, it can refer to any contract between poles and concrete blocks, whether they are exposed to the elements or buried underground.
As long as there is a chance that moisture will contact the wood, pressure-treating should be carried out. The last six inches of a structure above ground must be made of pressure-treated siding and structural wood, per the International Building Code, because of this risk.
Read about: How To Clean An Outdoor Rug Easily?
Do I Apply An Outdoor Finish With A Brush Or A Paint Sprayer?
As opposed to using a sprayer, brushing typically results in more sealant soaking into the wood. While using a paint sprayer is quicker than using a brush, it is also more superficial. Furthermore, spraying doesn’t leave brush strokes.
Diluting Sealants
Oil-based Sealants
With turpentine, acetone, or mineral spirits, you can thin oil-based sealants. Mineral spirits to three or four parts sealant is the usual ratio. You can use half spirits and half finish if the finish is particularly thick.
Water-based Sealants
Add water to water-based sealant to thin it. Similar proportions can be used to thin oil-based sealants: three to four parts sealant to one part water. For the sealant to have the proper consistency, gradually add water while mixing.
Applying Finish To Previously Finished Surfaces
If you’re using the same finish that was used previously and it isn’t too old, just thoroughly clean the surface. Reapply your finish after it has dried.
if you’re applying a different finish, it’s discolored, or it’s severely aged, then remove the old one. The finish will come off easier with rougher sandpaper. Use a paint or stain stripper to get rid of the old finish if sanding isn’t working or taking too long. Use of steel wool can cause rusting, so avoid it.
Your finish’s color may change if you apply finish over paints and stains. It won’t look appealing, most likely.
Recap
We are aware that was a lot of details! In order to treat your wood for the outdoors, hopefully this post has taught you something. Keep in mind that there are three ways to treat wood:
- Make use of an exterior-rated finish, such as polyurethane, epoxy, lacquer, or varnish.
- Mix equal parts mineral spirits, polyurethane, and tung or linseed oil to create a natural oil finish.
- Utilize a stain sealant combo that provides your wood with both a durable finish and some color.
Taking a car, with tickets costing an average of 18 USD and a 3-hour travel time, is the fastest way to travel from Raleigh to Myrtle Beach.
Conclusion
How should wood be treated for use outside?
There are very few types of wood that can be left outside untreated and withstand the elements. Redwood and cedarwood are two examples of these types of wood.
Nevertheless, depending on where you live in the world, these types of wood can be very expensive. Therefore, it makes sense that you’d prefer a less expensive option that still maintains its durability outside. Thankfully, humans have developed a variety of techniques for sealing wood to shield it from elements like rain, snow, insects, and other potential irritants.
Another option for your project is pressure-treated wood. To permanently protect it from the elements and all types of bugs, this type of wood has undergone chemical pretreatment. Therefore, this would be the best option if you don’t want to coat the wood by hand. However, keep in mind that pressure-treated wood can be challenging to paint.